|
Screenshot
For Auto Digital Video
|


 |
| |
|
The main features of iOS Auto Digital Video App
|
- Record the video after delaying the
indicted seconds.
- Record the video each interval
duration
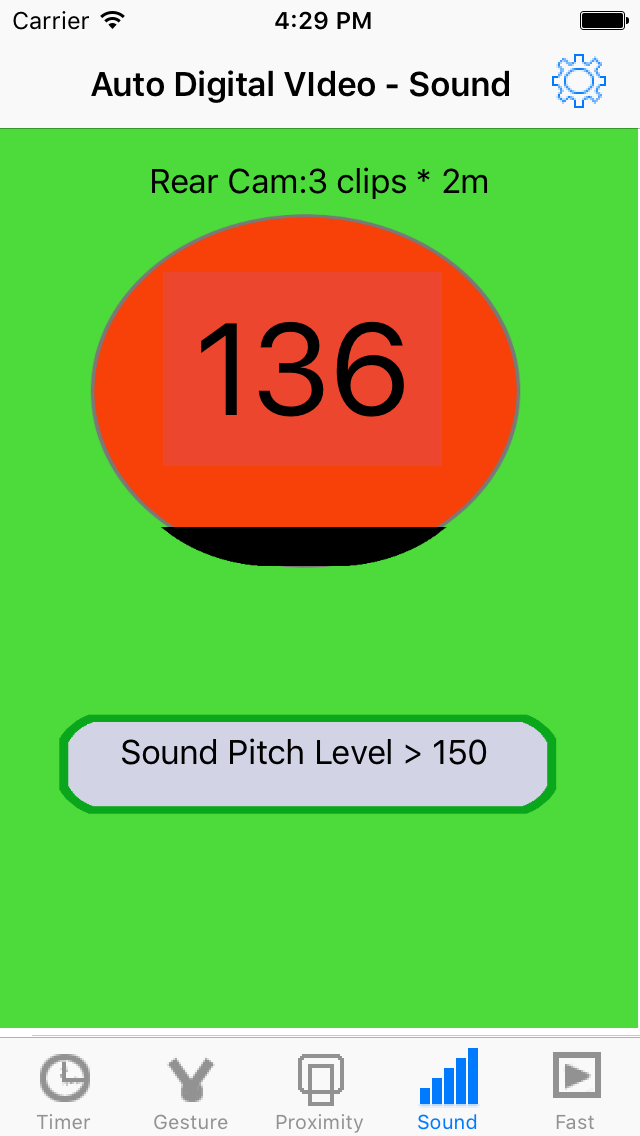
- Record the video by sound
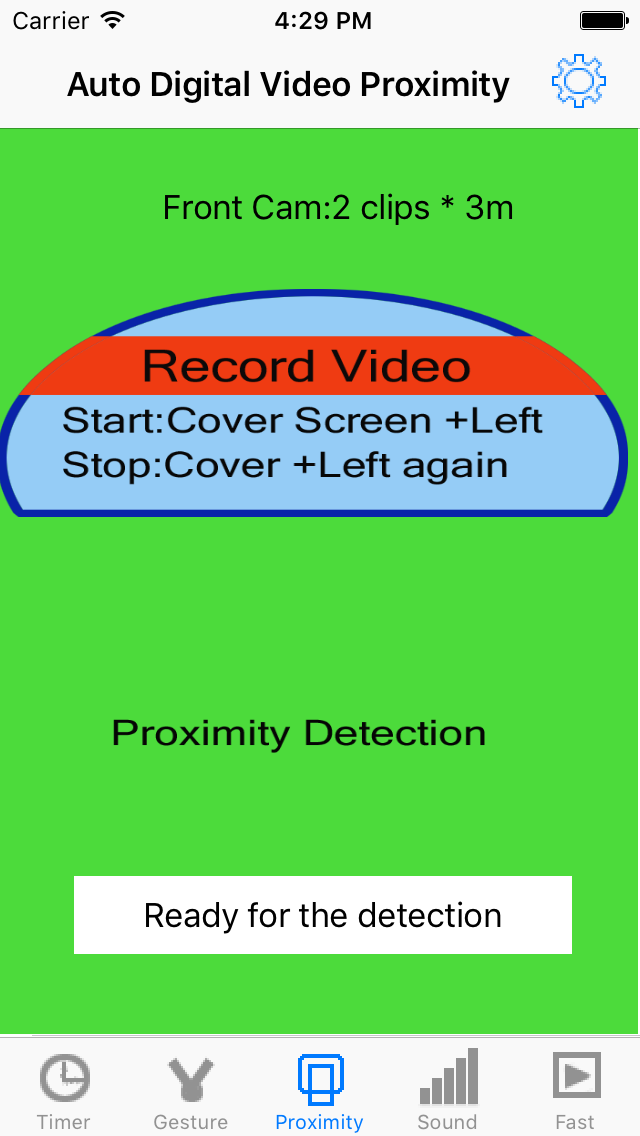
- Record the video by covering the top left
corner of iPhone screen
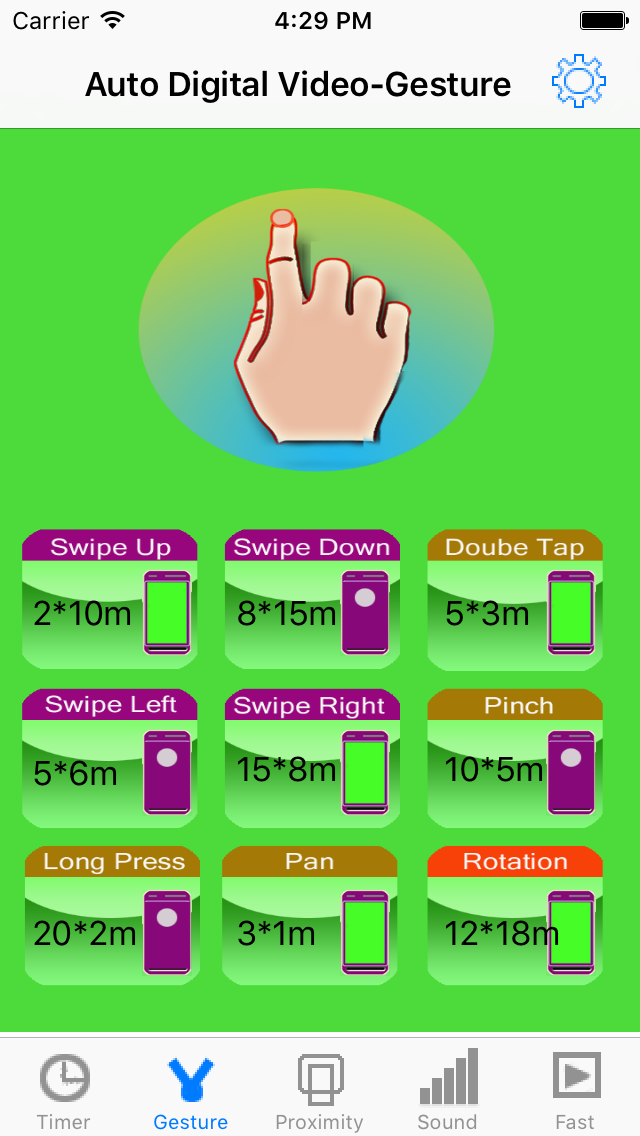
- Record the video by pinch,long press,double
tap,rotation, swipe,or pan
- Record the video automatically by launching
the App
- Just one command, take several video
clips one by one.
- Different gestures, different
actions.
- Set the preferences from the setting
view
|
|
FAQ 1: How to use the App to start & stop
recording video quickly and frequently while
walking?
|
- This feature is only available for iPhone
- Step 1: Open the proximity page by
tapping proximity button at the bottom left corner.
- Step 2: Walk as usual and hold the
iPhone in one hand, the two arms should just be at the
two sides of our body.
- Step 3: When we find something we
need to record, just let the iPhone screen close
to our clothes, make sure that your clothes could
cover the top left corner of the iPhone screen, after
that, direct the camera direction to the correct direction. At this time, camera preview will be
presented, the App will start recording video clips.
- Step 4: After already starting
recording, when we need to stop recording, just let the iPhone screen close
to our clothes, make sure that your clothes could
cover the top left corner of the iPhone screen, after
that, the recording will be stopped.
|
|
FAQ
2: How could we record videos including
ourselves?
|
- Step 1: Open the sound page by
tapping sound button at the bottom left corner.
- Step 2: Put our iOS devices two
meters or three meters away, just make a sound which
will be higher than the indicted sound level
- Step 3: Wait and the camera preview
will be presented, the App will start recording video
clips
- Step 4: if you cannot record
successfully,
please tap the setting button at the upper right
corner, in the setting view, please confirm the camera
type is correct. Please confirm the indicted sound
level is so small that could be made by you when you
are three meter away. Usually, in the room, the
indicted sound pitch sound be 110 or smaller.
|
|
FAQ 3: How to
record the video automatically when
launching this App?
|
- Step 1: Open the Fast tab page by
tapping fast button at the bottom left corner.
- Step 2: Press the home key.
- Step 3: When you need to use this
App, tap this App icon.
- Step 4: When the fast tab page is
presented, the camera preview will be displayed
automatically and start recording the video.
|
|
FAQ 4: How to use the different gestures to record
the video clips?
|
- this feature is only available for the professional
edition
- Step 1: Open the gesture tab
page by tapping gesture button at the bottom.
- Step 2: In the gesture tab page, make
different gestures to record video for different
preferences.
- Step 3: In the setting view, we could
set the preferences for the action of each gesture.
The preferences could be the number of photos once,the
camera device type, and enable or disable flash.
|
|
FAQ 5: How to use the sound detection to
record the video when we tap the table
|
- Step 1: Open the sound tab page
by tapping sound button at the bottom.
- Step 2: In the sound tab page, please
notice the level of indicted pitch
- Step 3: Put the iOS device on the
table
- Step 4: Make a sound which pitch
level is higher than the indicted pitch level
- Step 5: Just wait, if the sound you
make is higher than the indicted level, the camera
preview will be presented and the App will start
recording the video.
|
|
FAQ 6: How to use the proximity sensor to
record the video by hands?
|
- This feature is only available for iPhone device
- Step 1: Open the proximity tab
page by tapping proximity button at the bottom.
- Step 2: Put the iOS device on the
table
- Step 3: When the proximity tab page
is displayed, cover the top left corner of iPhone by
hand for one second and left our hand
- Step 4: Just wait, the camera preview
will be presented and the App will start recording the
video
|
|
FAQ 7: How to
record the video after 30 seconds?
|
- Step 1: Open the timer tab page
by tapping timer button at the bottom.
- Step 2: In the first section - One
Video With Camera, Select Delay 30 seconds, Duration 3
minutes
- Step 3: Tap the Record One Video button
- Step 4: Just wait 30 seconds, the
camera preview will be presented and the App will
start recording the video
|
|
FAQ 8: How to record several video clips one by
one?
|
- Step 1: Open the timer tab page
by tapping timer button at the bottom.
- Step 2: In the second section - Video
Clips
- Step 3: Set the single clip duration
(minutes)
- Step 4: Set the video clip number
- Step 5: Tap the Record Video Clips button
|
|
FAQ 9: How to open the setting view?
|
|
Tap the top right button, then the
setting view will be displayed.
|
|
FAQ 10: How to enable or disable the talking
feature?
|
- Step 1: Tap the setting button and
open the setting view.
- Step 2: In the first section -
General section, set the segment - Talk in English
|
|
FAQ 11: How to change the camera devices in the
timer tab page?
|
- Step 1: Tap the setting button and
open the setting view.
- Step 2: In the second section - Timer
Tab section,we could select front camera or rear camera.
|
|
FAQ 12: How to change the indicted sound pitch
level for detection & reaction
|
- Step 1: Tap the setting button and
open the setting view.
- Step 2: In the third section - Sound
Tab section, tap the blue button for sound pitch level
of reaction.
|
|
FAQ 13: How to set the duration of video when we
make a sound
|
- Step 1: Tap the setting button and
open the setting view.
- Step 2: In the third section - Sound
Tab section, tap the green button for Clip Duration.
|
|
FAQ 14: How to change the number of video clips when we
make a sound
|
- Step 1: Tap the setting button and
open the setting view.
- Step 2: In the third section - Sound
Tab section, tap the blue button for Clip Number.
|
|
FAQ 15: How to stop the sound pitch detection when
the sound is always higher than the indicted sound
level.
|
|
In the sound tab, when the action of
recording video is finished, the red color label is been
displayed, at this time, we could tab the
buttons-timer, proximity, gesture or fast at the
bottom as soon as possible, when we switch to other
tab page, the sound detection is stopped
automatically.
|
|
FAQ 16: How to change the setting for action of the fast
tab page.
|
- Step 1: Tap the setting button and
open the setting view.
- Step 2: In the forth section - fast
tab, we could set the clip duration,the camera type
and the clip number.
|
|
FAQ 17: How to change the setting for action of
the detection of proximity sensor.
|
- Step 1: Tap the setting button and
open the setting view.
- Step 2: In the fifth section -
proximity tab, we could set the clip duration,the
camera type and the clip number.
|
|
FAQ 18: How to change the setting for action of
gestures.
|
- Step 1: Tap the setting button and
open the setting view.
- Step 2: From the sixth section to
thirteen section, we could set the action for double
tap, pinch, long press, swipe up, swipe down, swipe left, swipe
right, rotation ,pan
|
|
FAQ 19:What
is the differences between the professional edition and the
standard edition.
|
- The professional edition includes the
gesture tab page which could detect nine gesture.
According to the different gesture, take the photo for
different preferences.
|
|
How
to contact with us
|
- Please contact us by opening the
following contact form.
- You need to fill your official name
in English.
- You need to provide your email
address.
- You need to fill your message in
English in the comment text field.
-
- Open
the Contact Form
|
|
|
|
